Archives for posts with tag: recipe

sunny pizza

“Can we have pancakes now?” Monkey asked after he had just devoured three pita pockets filled with cheese and carrots.

“No, you have to wait” said Sunny who just happend to be passing by carrying a big flat box. “We haven’t even mentioned the most important food in the whole wide world.”

“What could this be?” Mouse wondered and looked at the list of recipes covered so far. There were crackers and pasta and buns and bread. All the basic foods you need.

“C’mon, what does everybody love?” asked Sunny expectantly.

“Chocolate?” answered Mouse a little unsure.

“I give up.” Sunny dropped the box on the table and threw his hands in the air. “What do you think is in my box? Pizza of course! ”

“Pizza!”, “Pizza!”, “Pizza!” the Dedes shouted excitedly and Monkey knew immediately he wouldn’t have a chance in hell of getting a pancake recipe today. “But then we can have some pancakes, right?” Mouse ignored his comment and turned to Sunny. “You’re right, that should be next so give me your recipe.”

“What recipe?” Sunny looked surprised. “I don’t make pizza, I eat it.” Mouse wondered how Sunny could afford to buy pizza all the time as he doesn’t have a job. He wants to be an artist and is waiting for his break. In the meantime he still lives at home and his mum does all the cooking when he doesn’t have pizza.

“Oh, dear.” Mouse felt like screaming, but then L’Artiste stepped forward and saved her from just doing that. “I know how to make pizza. I make it quite often in my studio. It’s perfect to eat between brush strokes.”

And then he told us what he puts on his pizza: salami and ham and olives and garlic and onions and red peppers and chilly and capers and anchovies and pineapple and artichokes and chicken and mussles and scampi and all covered with a thick layer of grated cheese. Everybody knew he was just dreaming as most of the time he is poor. Then he makes a pizza base, drizzles a little olive oil on top, sprinkles it with italian herbs and chops up a clove of garlic or two to finish it off. “That is delicious too, you know” he said, and we knew exactly that is what he has most of the time.

Even though it is a yeast dough, you don’t have to wait too long for the dough to rise, unless you want to have a really spongy pizza bread. The Dedes prefer the crunchy ones.

Ingredients

2 cups of flour, 1 scant teaspoon of dry yeast, 3/4 cup of warm water, garlic, herbs and oil to flavour

Method

Preheat the oven to 2000C.

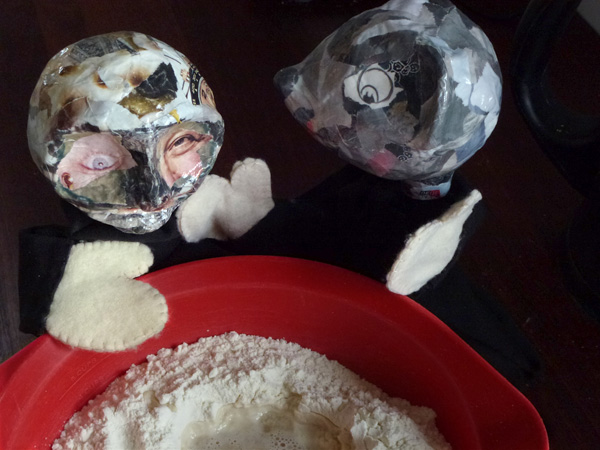
Pour flour into a bowl, make a well in the middle. Add half the warm water and add the yeast. Let sit for at least 10 minutes so the yeast becomes active, which you can see when it becomes frothy. You don’t want to let it sit for too long.

While the yeast is doing its thing, chop garlic, place in a cup and pour oil over it. Add herbs to your liking. There is absolutely no precise measure for that, anything goes.

Mix the slushy yeast with the flour and add as much of the remaining water needed to make a dough that is not sticky. Knead well. Let sit for five to ten minutes and knead again.

Divide the dough into two balls and roll out with a rolling pin.

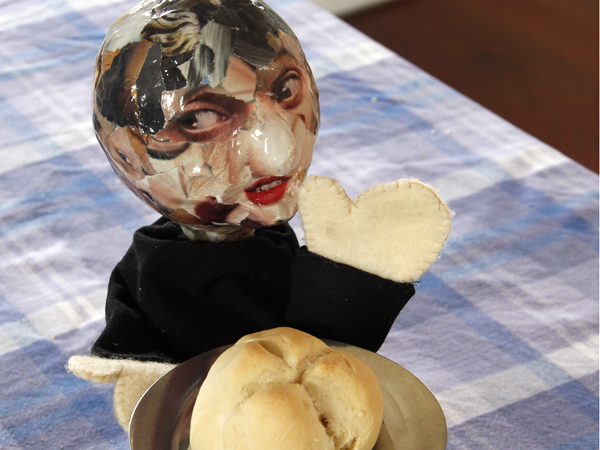
In a pizza shop the pizzas are always nice and round. Not at L’Artiste’s place. He rolls them out to a shape that lets him fit two side by side on a standard size baking tray. It might be a heart, or the map of Australia, whatever his creative mind comes up with. Then he places them on lightly floured tray and pours the oil/garlic/herb mixture on and spreads it around with a brush.

Bake for 12 mins.

bobby pitay

“Guys, guys, guys. Don’t you realise we’re doing the same thing over and over again with just a few minor changes?” asked Monkey.

“That’s so not true.” defended Mouse. “While there are plenty of similarities there are also heaps of differences.”

“What about a good pancake recipe? I love pancakes! And Judy – you know the wife of Punch – would like to make pancakes too.” The other day Monkey was talking to Tony’s puppets in Australia. To his surprise he discovered that Judy had a pan, but thought it was only good for whacking Punch. When Monkey asked her to make some pancakes, she didn’t know how.

“Maybe she should try Devil’s flat bread first. We will have pancakes soon, but you need eggs… and milk and sugar.”

“Egg yes, but not necessarily milk” answered Monkey “I am really dying for some pancakes with thick slices of banana on top. Doesn’t Push Push the elephant have good recipe?”

A heated discussion ensued. In the end the consensus was that pita bread should be made first, as this bread is made from flour, water and yeast only, with an optional dash of oil and salt. Bobby the policeman was happy to share his trusted recipe.

“I like to make my pita in the oven” he said, “but you also can make it on the stove top if you don’t have an oven. That’s what I did when I still was at police school. I was boarding then and only had a cooker with one element.”

“See, Monkey” said Mouse.”Judy could try this recipe too. If she’d used the pan properly maybe Punch wouldn’t be quite so obnoxious.”

Ingredients

2.5 cups flour, 1 cup warm water, 1.5 teaspoons dry yeast, 1 teaspoon salt, 1 teaspoon olive oil (optional)

Method

Put the flour in a bowl. Make a well in the middle and pour in half the water and add the dry yeast. Let sit for 10 mins until the yeast is sloshy. Then mix the flour and water to make a dough and add the remaining water in the process. Move to a clean work surface and knead. Resist adding more water. It needs to be a dry and heavy dough. Knead for at least 5 minutes until it is smooth and elastic. When making pita bread, this is the only time you knead throroughly so you might as well do it properly.

Clean the bowl and place the dough in it. Put a little olive oil in the bowl and swipe with the dough, so that the entire surface is covered in a thin oily film (this is not absolutely necessary, but it keeps the dough from drying out). Cover the bowl with a clean tea towel and let rest for at least 1 hour in a warm place.

Heat the oven to 2200C

When you are ready, deflate the dough gently and put it on a lighly floured work surface. Divide into 8 balls and flatten them out into a thick disk by rolling them out with a rolling pin to the size you want. Sprinkle with more flour if necessary. Place them on a floured baking tray and let rise for another 5 minutes or so (while the oven is heating up). It is important that the oven is properly heated as the instant heat will help the bread to puff.

Just before you put the tray in the oven, flip the pieces over. Once they are in the oven, it should take around 3 minutes for them to puff up. They are ready when they have finished ballooning. But you might keep them in the oven a little longer to brown them a little. I bake my ones between 5 and 8 minutes. When they come out of the oven they are hard, but they soften when they cool down.

If yo don’t have an oven, you can puff your pita in a pan. Lightly grease a skillet and heat it up high. Place one of the pieces of dough in it and wait until it is puffed. Flip over and brown the other side. Press the edges down with a spatula if neccessary.

Left over pitas keep in an airtight bag for several days and can be heated up in the toaster. You also can freeze baked pitas for up to 3 months. Place some waxed paper between the individual pieces when freezing.

techno man and milk bun

“With your buns you just add water to the flour” remarked Techno Man. “I wonder if my recipe is different. It has been in my family for generations.”

“Let me guess,” said Mouse, “ you are using butter and milk, right?”

“That’s it!” said Techno Man. “We use butter and milk. I think the recipe is really good and it comforts me that it is so old. It’s tried and trusted, it can’t be wrong! So, why are you using only water?”

Mouse explained that the original idea of this recipe collection was to demonstrate that you can easily make these staples at home, quickly and cheaply. The collection will become the Artist’s Survival Cookbook. The Dedes are annoyed to see a loaf of bread  in the supermarket costs $7 or a tiny packet of Grissini is $5. For the same price Mouse can buy a 5kg bag of flour and feed the troops for a couple of weeks. Of course, everybody knows that white flour is not the healthiest option. It basically has no nutritional value at all. It’s lack of nutritients is second only to sugar. Unfortunately the majority of baked goods you get in the supermarket and in most bakeries are made from white flour with a good measure of salt, sugar, hydrogenated fat, preservatives and other additives. The Dedes’ reasoning is that making it yourself doesn’t take long and you know exactly what’s in it. Once you realise how easy it is you might become more adventurous with different flours and flavours.

If you live on a tight budget, and you haven’t done much cooking before, it doesn’t make sense to start with a complicated meal. You don’t want to buy unusual ingredients, use a small amount and leave what’s left in the packets to rot in the pantry when you are not even sure if your meal will turn out okay or not.  Why not start with the simplest of recipes. If the no-egg pasta recipe doesn’t work, you might have to throw away 30c of flour (but what can go wrong with this recipe anyway?) If it works, you saved yourself $1.50 or so. If it is not to your taste, try egg pasta. (I have yet to find a person who doesn’t like my egg pasta, apart from a vegan or a gluten-intolerant person, of course! But I wouldn’t cook it for them).

You can only win. Involve your kids in making the food. Flat bread, for example, is so easy and they will love it. Next time you are in the shop, have a look at how much a packet of flat bread will set you back. I’ll bet if you make it according to our recipe it will cost you a fraction of that and it’s healthier. And not only will it feed you, it will also give you quality time with the kids.

“Are you actually answering my question, Mouse?” asked Techno Man impatiently.

“Ah, sorry” she said. “Was I raving on again? I am really passionate about the subject, you know. Of course there are other recipes, but using milk and butter makes the buns just a little bit more expensive.”

“But also better”

“Let the cooks be the judge of that. You never know what people like. Milk and butter make the dough heavier and not everyone favours that. I personally like the water ones. Other people prefer them because they are lactose intolerant or choose not to eat animal products.”

“I really like them as a condiment with a hearty soup. It makes a complete meal” Techno man insisted. “You are definitely right there.” Mouse agreed.

Ingredients

3 cups of flour, 50g butter, 250ml milk, 1 teaspoon of dry yeast, salt (optional)

Method

Warm up milk and butter in a pot. Make sure the milk is lukewarm only and the butter melted (If it is too hot you have to cool it down, as heat kills the yeast.) Pour the flour on to a flat surface. Make a well in the middle and pour in the milk/butter mix, add the yeast and let sit for 15 minutes. It will dissolve but won’t get quite as sloshy as with water and no butter. Knead to an elastic dough. Place the dough in a bowl, cover with a clean tea towel and let it rise for one or two hours.

Preheat oven to 200 0C. Knead again and form oblong buns. Place on a baking tray dusted with flour and let it rise again while the oven is heating up. Brush with milk and cut the surface lengthwise before you place them in the oven.

Bake for 20 minutes.

“I have to ask you” said Mouse after she had read the recipe. “Why does it say oblong buns? And you slit them lengthwise. Is there a reason?”

“None at all. It is just that it is such an old recipe and that is the classical look of a milk bun.” answered Techno Man.

deutsch pretzel

Granddad Max and Mouse were about to put a new batch of buns in the oven when Deutsch Fraulein came running along. “Stop, stop” she shouted waving frantically with her arms. “I want to show you something! This is my favourite recipe…”

Mouse and Granddad Max nearly dropped the tray. “Wait your turn.”

“No, really!” Deutsch Fraulein was short of breath and puffing. “You can turn these into pretzel buns and they will taste so much better.”

“Pretzel buns? What’s that?” Granddad Max obviously thought it was a new thing.

“You know, like the nibbles, the little pretzel bows you can buy in a packet. Where I come from they are much bigger, just like normal buns.” And then Deutsch Fraulein admitted that she missed them a lot. She had to learn how to make them as you couldn’t buy them here. Now you can, though, in a few places, but they’re so expensive Deutsch Fraulein can’t afford them.

“Are you sure it is the same recipe?” asked Mouse.

“Yes, absolutely” said Deutsch Fraulein. “The difference is, before you place them in the oven, you boil them for 1 minute in a solution of baking soda and water. Sounds strange, I know. Just trust me.”

Granddad Max and Mouse looked at each other and weren’t quite sure what to make of it.

“Just run the whole recipe past me again” asked Mouse. She wanted to check if it really was the same dough.

Ingredients

2.5 cups of flour, 1 cup of warm water (or half water and half milk) and 1 teaspoon of dry yeast. For the pretzel solution: 1.5 liters of water and 2 generously heaped table spoons of baking soda and rock salt to sprinkle on top

Method

Pour flour into a bowl, make a well in the middle and add half the water and the yeast. Let sit for 15 minutes until the yeast is sloshy.

Knead to a dough on a flat surface, adding the rest of the water. Then put it back into the bowl, cover with a clean tea towel and put in a warm place until it has doubled in size.

Knead again, divide into 8 balls and let rise once more.

Preheat the oven to 200 0C. At the same time prepare the pretzel solution: in a large pot pot bring water to the boil. Be very careful when you add the baking soda to the boiling water as it will foam.

After the buns have risen again, boil them in the baking soda solution for 1 minute. Then place on baking paper on a tray. Sprinkle with rock salt. You will need the salt to get the flavour. If you don’t want to eat so much salt you will have to scrape it off after baking.

With a sharp knife, cut an x on top of each one and then bake in the oven for 20 minutes.

“But why do you make pretzel buns not pretzels?” asked Mouse.

“It’s just a different shape” admitted Deutsch Fraulein “Keeping the shape of a pretzel when you are moving the risen pieces to the pot and back is a little trickier, but not a problem with a skimmer” She took one of the pieces of dough and turned it into a real pretzel.

“The boiling in the brine makes it a pretzel. You can make any shape, of course, but nothing beats the real pretzels with the thin crunchy bit on one side and the softer part on the other where you can put your spreads.”

 grand dad buns

“I can’t eat anything wholemeal” remarked Granddad Max and pointed to his dentures. Everybody looked at him. He has this most amazing smile. They didn’t quite understand why wholemeal should interfere with his false teeth. Witch stood behind him, shook her head, and mouthed so only the others could see, “excuses, excuses” then added quietly, “he is just not used to it.”

“I can understand Granddad,” said Mouse. “The Soda bread is a bit tough on the teeth.” She put her arm around him and asked interested, “so what is your favourite recipe then?”

“I quite liked the buns Witch made last year. Would you mind if I re-published her recipe? ” he asked. “I’ve never cooked a thing in my life, you know, the kitchen was Grandma’s domain. God bless her” he added.

“Go ahead then old man,” encouraged Mouse, “but make it a bit shorter than Witch did. She waffled on a bit then.” You should have seen the look Witch gave Mouse after that comment. “Only trying to be helpful” she mumbled. “Right” said Mouse in an attempt to soften her earlier words “and you were of course explaining so someone who had never baked before could understand. But now that we have tried so many recipes I think our readers get the picture.”  Witches Buns

Granddad Max produced a print-out of the recipe from his pocket, smoothed it out, and started to edit what Witch had said.

“Good editing job”, said Mouse when he was done and she had read it. “That’s easy, I will make them for you and we’ll see if you got it right. Watch me, and maybe you can do them yourself next time.”

And then she made it. But something wasn’t quite right. The dough was too dry and Mouse had to add a little bit more water. “What happened here? Did you ever try your recipe?” she asked Witch.

“Of course I did” said Witch. “But I just add water until it feels right.”

“You have to be a bit more careful with your descriptions, Witch.” Mouse scolded her. “The readers don’t know yet what feels right! I have changed it to 2.5 cups of flour now instead of 3. There is not a lot of difference, but I think that is better. ”

“But with a yeast dough, it is easier to add water if necessary than to add flour” Witch defended herself.

“If the dough is too moist, just knead it longer. The flour will take up the excess water”

Ingredients

2.5 cups of flour, 1 cup of warm water and 1 teaspoon of dry yeast.

(makes approx 8 buns)

Method

Pour flour into a bowl, make a well in the middle and add half the water (make sure the water isn’t hot, as hot water kills the yeast) and add the yeast. Let sit for at least 15 minutes so the yeast becomes active, which you can see when it foams.

Add the rest of the water and knead to a dough, first in the bowl, then on the bench. Knead very thoroughly for five minutes. Put the dough back in the bowl, cover with a clean tea towel and put in a warm place to let it rise until it has doubled in size. In a cooler place this process will take longer, but it will happen.

After an hour or so knead again. It doesn’t need to be as long as the first time, it’s just to get the air out. Then let rest until it has noticeably risen again.

Preheat oven to 200 0C.

While the oven is heating up, knead the dough one more time and divide into 8 balls. Place the balls on baking paper on a tray (I use a silicon mat as it can be reused again and again) and let it rise again. 10 minutes should be enough or until the oven is properly preheated.

Brush the buns with water and cut an x with a sharp knife on top of each one. Sprinkle with poppy seeds or sesame seeds. (Not for Granddad Max though, he added with a smile)

Bake for 20 minutes.


snotty nosed soda bread

“That, my dear, sounds like rather a lot work for a loaf of bread” said Snotty Nosed Prince. But Mouse waived his concerns aside “No, honestly, it isn’t that bad. I put the dough on before the movie starts and I continue in the breaks. I don’t have to watch the dough, or the adverts for that matter. Suits me well.”

“But you can’t quickly whip up a loaf should you get unexpected guests, can you?” Snotty Nosed Prince pointed to a loaf that was sitting in the middle of the table. “Look, my Soda bread is ready to be consumed in 40 minutes and – even better – it doesn’t have yeast in it.”

Mouse was interested as she knows quite a few  people try to avoid yeasts and the loaf looked really hearty. She came a little closer and knocked on it. It sounded hollow under the crust.

“So how do you make it?”

“It’s an old Irish recipe from my wet nurse” Snotty Nosed Prince said proudly. “The only draw back is you have to eat it on the day. But honestly, who could resist!”

“I see you use buttermilk in it” Mouse said when she glanced at the recipe. “What is that supposed to do?”

“That is an additional leavening agent. Yes, I know it is not one of the basic foods you have sitting in your fridge. If you don’t have any at hand, use normal milk and put lemon juice or vinegar in it. I personally prefer lemon juice.”

Ingredients

1 cup plain white flour, 2 cups wholemeal flour, plus a little extra to sprinkle, 1 tsp baking soda, ½ tsp salt, 300 ml buttermilk or alternatively normal milk with 1 tablespoon of lemon juice added.

Method

Preheat the oven to 200 0C.

Put white and wholemeal flours, baking soda and salt into a bowl and mix well with a fork.

Make a well in the centre and pour the liquid in. Stir the flour into the liquid  using your index finger to make it a soft dough. Then move it to a lightly floured work surface and knead quickly and lightly to a dough that holds together. Make sure you don’t overwork the dough, otherwise the bread gets too hard.

Form a ball and place on a greased baking sheet. Flatten it ever so slightly. Cut a deep cross in the top of the loaf (about half way). Sprinkle a little extra wholemeal flour over the top.

Bake for about 30 minutes or until well risen and browned. Test by tapping on the base, if it sounds hollow, it is done. If it sounds dull and heavy, bake for a further 3–5 minutes and then test it again.

Cool on a wire rack and eat the same day.

This bread goes very well with soups, for example a creamy pumkin or carrot soup. It is also nice buttered and with honey. If you have some left over, you can toast it the next day.

“Oh yes, the bread was easy to make,” said Mouse exhausted. “But it took ages to get a reasonable picture with the prince and his loaf. He just didn’t want to smile.”

mouse bread copy

“I think it’s my turn now. We need a good solid bread recipe” Mouse remarked, after she had tried all the recipes with just water, flour and some sort of fat, but no leavening agent.

“Do you have a bread making machine?” Nitpicker asked. “I don’t need one.” Mouse replied proudly. “I am a purist. I love kneading the dough.” Mouse is indeed constantly baking bread, just in case visitors drop by. As she never knows how much she will need, she usually bakes two loaves. One goes in the freezer and the other one stays in the bread box to be eaten. When the first one is almost finished she gets the other one out of the freezer and by the time it is required, it will be defrosted. Sometimes she bakes three times a week. But it’s not really a big deal as the dough doesn’t need to be handled much. It mainly sits around rising and Mouse can do other things in the meantime.

“I will write down my basic recipe” Mouse said as she put pen to paper. “Once you have done a few loaves you will become more adventurous with your breads. Feel free to experiment with different flours or add linseed or sunflower seeds to the mix, anything you want that your family eats. I personally like caraway seeds in my bread. It helps digestion but it’s not everybodies kettle of fish.”

“So what do I have to watch out for when you can alter the flour as one pleases and add more stuff?” asked Nitpicker, who really feels unsure when instructions are too vague.

“You need to have a good amount of glutenous flour, ie. white flour or whole meal flour, rye flour, spelt or barley. Gluten has a bad reputation but it helps the dough to rise, and gives it shape and a chewy texture. So don’t replace all the flour with gluten free types, though you can add some, for example buckwheat flour.

“And then you have to give it time to rise. Please also be aware that your yeast might be different from the brand I use and might behave differently. For example, some dry yeasts can be mixed with the flour and you don’t need to slosh it up before you knead your dough. The brand I use doesn’t contain anything except dried active yeast and salt and I definitely get the best results when I allow it to foam in liquid first. The same company that produces my yeast puts out a special yeast for bread making and this one also contains wheat flour, emulsifiers (481, 472e), flour treatment agent (ascorbic acid), sugar, vegetable oil and enzymes, as well as yeast. Personally, I am happy with my bread and others love it too, so I don’t see the need to add all that stuff to it. I recommend you try the recipe by the book and if the result isn’t quite what you expect, make some slight changes next time. If the final product clearly tastes yeasty, use less yeast next time. If it doesn’t rise much, use more. But don’t give up. And though you might not believe it, it also mightn’t have worked perfectly just because you baked on a very humid day.

Ingredients

5 cups of white flour and 2 cups of whole meal flour, 2 teaspoons of dry yeast, approximately 3 cups of water, salt (optional). Water to brush on the loaves.

Note: the proportions of the two types of flour are not that important as long as they combine to 7 cups. Use more whole meal for a heavier bread and more white flour for a lighter one.

Method

Combine the two flours in a large bowl and mix thoroughly with a fork. Make a well in the middle and add 1 cup of lukewarm water and the yeast. Let sit for 10 minutes until the yeast looks like sloshy foam. Then mix water and flour together and add the rest of the water. Transfer to a flat surface and knead throroughly for 5 to 10 minutes. I quite enjoy the kneading process. It can be very therapeutic when you’ve had a stressful day.

Place the dough back in the bowl. Cover with a clean tea towel and let it sit in a warm place. The dough will rise to double its size, so it is important you have a big enough bowl. Let it sit for roughly an hour or longer if you want. You can even leave it over night and bake in the morning. Nothing is as nice as fresh bread, still warm from the oven.

Preheat the oven to 210 oC

Take the dough out of the bowl and knead again. Add the salt now, if you want to add salt. Sprinkle flour on a baking tray. Divide the dough into two loaves and place on the baking tray. They will fit side by side on one tray. Let the loaves rise for another 10-15 Minutes until they have has visibly enlarged. The oven should have heated up to the right temperature during this time.

Brush the loaves with water (this will give the bread a crust). Cut the surface diagonally with a sharp knife. I also place a water-filled ramikin on the baking tray for extra crunchiness.

Bake for 45 minutes.

Let cool on a rack.

“I am a little dissappointed” Devil said. “I was hoping you will give us your really yummy sour dough bread recipe. Wouldn’t it be more appropriate here, as sour dough is nothing but water and flour?”

“Yes,” said Mouse, “your are right, but we are only at the beginning. A sour dough starter takes a few days to develop as it works with wild yeasts from the air. Also, you need to use rye flour instead of white flour. We will look at it later. In the meantime let’s take the short cut and use dry yeast.”

cahpati2

Nitpicker came into the kitchen when Devil and Mouse tried out the flat bread wrap together. When he saw them looking into the pan at a flat bread and dicussing whether it was done or not he got quite angry. “Are you guys making chapati?” he yelled.

Mouse turned round and said “No, this is Devil’s flat bread wrap, why?”

“It looks damn similar to my chapati” he replied and grabbed a finished flat bread from the plate to try. “Ah no,” he said relieved and added with the air of an expert “there is butter in them. My chapati are non-dairy. They contain oil and water only.”

“So what’s your recipe then?” Mouse asked and Nitpicker handed over his piece of paper. “I just want to point out it says flour on my piece of paper, and of course I mean whole meal flour!”

“You can use white flour or whole meal in any of the recipes, or even a mixture, if the troops baulk at whole meal and you want to sneak in something more nutritious” Mouse said. “But if you use whole meal you might have to use a tad more liquid.”

Ingredients

2 cups of flour, salt, 2 tablespoons of olive oil, 150ml water

Method

In a bowl mix flour and salt together.  Stir in olive oil and water and knead on a flat surface until firm and elastic. If it is too dry, just wet your hands with water and knead again. The dough will feel slimy in the beginning but the water will disappear into the dough when you continue kneading. In this way you cannot overdo the amount of water. Continue until you have the desired result. Let it rest for 5 minutes. Divide into eight balls and roll out as thinnly as possible on a surface dusted with flour.

Heat a frying pan over a medium-high heat (note: no oil). Place the chapati in the pan for about 2 minutes per side. Brush with olive oil before serving.

The three Dedes were cooking the latest recipe together and Mouse and Devil discussed how similar the two recipes indeed are, though Devil didn’t like that the whole meal chapati didn’t puff as nicely as his flat bread. In his mind, of course, his recipe was miles better. Then Detail came into the kitchen said exitedly, “Oh goody, that’s another one I can make for vegan Evan!”

“It’s also good if you simply have no butter in the fridge” Mouse pointed out.”Most people always have some oil in the pantry. I am pretty sure you can use any vegetable oil if you don’t have olive oil.”

Nitpicker shook his head at how loosely Mouse interpreted his recipe. He would never dare stray from what was written down.

socialite bun

Right, it must have been a crazy New Year’s day brunch. Socialite didn’t come home till midnight, but she came home alone. When she finally got up at lunch time the next day she was so happy to find her dough still sitting in the fridge, as the bread bin was empty again. You have to be fast around here when you get up late. The others might beat you to the food. She looked at the dough, it had risen a bit, even in the cold of the fridge. It had lifted the lid of the bowl it was in, but as it was oiled it was still elastic.

“What better way to start the day than with a cup of coffee and fresh buns with butter and jam?” Socialite grabbed the piece of dough and looked at it. “If I only knew what to do next!”

Witch happened to be in the kitchen cleaning up after the others who had a long breakfast today. “Oh, WitchSocialite whispered in her sweatest voice, ”please, make me some buns. I don’t know how to do it.”

“C’mon, you’re nearly there.” Witch wasn’t going to do it for her, but she talked Socialite through. “You have half the dough left from yesterday. That is enough for four buns. Heat the oven to 200 0C. Knead the dough briefly, make four balls, put them on a tray dusted with flour. In 15 minutes the oven should be hot, brush the buns with water, cut a cross in the surface and put them in the oven for 20 minutes. Done!” Then she left the kitchen.

That was all too much for Socialite, but as she was really hungry she gave it a go. She put the oven on 200 0C, kneaded the dough halfheartedly, formed four buns and placed them on the tray. While she was waiting for the oven to heat up she made her coffee. Once the oven was heated, she cut a cross in the surface of the buns and then realised she had forgotten to brush water on beforehand, she didn’t even know where the brush was kept. Witch wasn’t there to ask for advice. To start afresh was out of the question. “Ah well” Socialite sighed, shrugged her shoulders and held each of the buns under the running tap for a brief moment. Then she put them back on the tray and into the oven.

Twenty minutes later she had the most delicious buns. “Oh that worked out well,” she said to herself. “From now on, I will always keep some dough to make buns the next morning. Or maybe I double the recipe to start with” She couldn’t wait for them to cool down and devoured them there and then, even though her mother had always warned her not to eat warm bakery products that contained yeast. It is suppose to give you a tummy ache. Socialite had no problems, but then she might have one very sturdy stomach. Who knows.

socialite grissini

Socialite was invited to brunch on New Year’s Day. In our neck of the woods, you are often asked to “bring a plate” when you are invited to a social gathering. Don’t be fooled, it doesn’t mean your host doesn’t have enough dinnerware and you have to bring your own. No, you are expected to fill your plate with something edible to share. Now, Socialite is by no means a kitchen goddess, the less time she has to spend in the kitchen the better. To be honest, for her it would be easiest to nip down to the supermarket and buy something. But this is the crux, she rather spends her money on fashion and make-up than to buy classy food to share around. Unfortunately she is faced with a champagne taste on a beer budget. Luckily she found in one of her women’s magazines this simple recipe for Grissini to go with any dip. The name sounded intriguing, she tried it and loved it. Grissini is the Italian name for bread sticks, and by no means difficult to make. But as it is a yeast dough some rising time is involved. Socialite is certainly not known for her patience and it works in her favour that if you want the Grissinis to be crunchy, you shouldn’t let them rise too much. She finds the time the dough needs to rise is exactly the time she needs to make her dip, usually some sour cream based concoction with fresh herbs.

Needless to say, she gets a lot of praise for her bread sticks, otherwise she wouldn’t make them. The noble sounding name might have something to do with it. Don’t you dare to call her Grissini simply bread sticks. Ever!

Ingredients

3 cups of flour, 1 teaspoon of dry yeast, 1 generous cup of lukewarm water, 3 tablespoons of olive oil, pinch of salt if you wish. For the topping: water, mediterranean herbs and sesame or poppy seeds (optional).

Method

Preheat oven to 2000C

Put flour into a bowl, make a well in the middle and pour in most of the water and add yeast. (I always keep some of the water and add later if needed). Let sit for 5 to 10 mins until the yeast has turned into sloshy foam. Add salt and oil and combine everything to an elastic dough, which will take approximately 5 minutes of kneading. In the process add the rest of the water if necessary. The dough should be dry and not sticky. Generally if you knead longer, the flour will absorb the excess water. If it really doesn’t happen add some more flour, but only then.

Put the dough in a bowl, cover with a tea towel and let rest in warm place for 5 to 10 minutes. Knead again and roll out to a rectangle of about half a centimeter thickness. Cut the rectangle into two halves and then into strips of 1 centimetre width. Take each of these strips and roll between your hands to round snakes. (The thinner you roll them, the crunchier they will get in the end. If you make them too thick, they will turn into oblong buns). Then place on a baking tray dusted with flour or on a silicon mat. It is a bit like a jig saw puzzle to place them well on the tray. Leave enough space between the individual pieces, as they will expand during baking. Most likely you will fill two trays.

In a cup or ramekin combine some water and herbs and brush the mixture on the snakes of dough. You might want to do half with herbs and water and brush the other half with water only and sprinkle poppy seeds and/or sesame seeds on the remaining sticks.

Bake in the oven for 15 minutes or until golden brown. If you want really crunchy ones, bake for a little longer.

Cool on a wire rack. Don’t let them cool down in a closed tin. When they cool, water is released, which will form condensation in the tin and make them really soft. Yuk.

Socialite ran out of time to do two trays. That is so typical for her. She didn’t want to waste the rest of the dough and packed it in cling film and chucked it in the fridge. Mouse saw that and mumbled: “I bet she  hopes to score a date today. Then she can turn the dough into nice fresh buns tomorrow morning.” As Socialite was in a hurry and is not the most careful Dede by nature, Mouse thought she better check that she had packed the dough properly.  It doesn’t need to be cling film, but it needs to be airtight, otherwise the dough will get a hard crust. The best is to pour a little olive oil in your clean hands and distribute it on the surface of the dough, then place it in an airtight container and in the fridge.