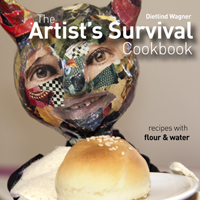
Witch never got as much attention as yesterday. All the Dedes waited by the oven and wanted to inspect the result as soon as the timer went off. As if they had never had a bun baked by Witch before! Witch got quite protective and shooed everybody away. We weren’t allowed to taste them until they had been photographed. As I told you yesterday, Witch is usually one to throw things together and if you ask her for a recipe she can’t tell you. Much to my surprise she was very consciencious yesterday and noted every step along the way. Here is her transcript:
Bread buns
The main incredient in this recipe is patience. While it actually doesn’t take much time to prepare, the dough will need a lot of time to sit around and rise. If you try to take a shortcut, you will end up creating rocks rather than buns. I would recommend trying the recipe first for a Sunday morning treat. Prepare the dough the night before (maybe in the ad breaks when you watch TV, or if you don’t watch TV, you can tend to the dough whenever you make yourself a cuppa).
Ingredients for eight buns
3 cups of high grade flour, 1 cup of warm water and 1 teaspoon of dry yeast.
Method
- Pour flour in a bowl, make a hole in the middle and add half the water (make sure the water is not hot, as hot water kills the yeast) and add the yeast. Let it sit for at least 15 minutes so the yeast becomes active, which you can see when it becomes sloshy. It’s better to let it sit too long than not enough.
- Add the rest of the water and knead to a dough, first in the bowl then on the bench. Knead very thoroughly. It is a good exercise for your upper arms ;) and you want to spend five minutes or so on it. Then put it back in the bowl, cover with a clean tea towel and put in a warm place until it has risen to twice its original size. If you don’t have a warm place (you poor thing), this process will take longer, but it will happen.
- In an hour or so, maybe when the TV program has finished, come back and knead it again. It doesn’t have to be as long as the first time, really, it’s just to get the air out. Then let it rise again. At this point you can go to bed if you are preparing the dough for Sunday morning. Otherwise, come back in yet another half hour. Time is not that important, just make sure it has risen comfortably and noticably again.
- Switch the oven on to 2000 C.
- While the oven is heating up, knead the dough again and divide into 8 balls. Place on baking paper on a tray (I use a silicon mat as it can be reused again and again) and let it sit to rise for one last time. Like 10 minutes or so. This gives you enough time to go into the garden and pick some flowers and lay the table nicely.
- Once the oven is heated to the right temperature, brush the buns with water and cut an x on top of each one with a sharp knife (this process will flatten them a little). Personally I love poppy seed and sesame buns. So I sprinkle them with seeds.
- Then I place a little bowl filled with water on the baking tray and off they go into the oven. (The water will evaporate in the heat and make the buns crispy).
Bake for 20 mins. And that is it.
Don’t ask me if you can freeze the dough or the buns. I never had to. They are always eaten as soon as I make them!
Here is a picture gallery of the process: when the buns were rising for the last time on the tray, then the cross cut into the surface to illustrate what I mean, and of course the final result.


Looks great…a little butter while they are warm and that’s all you need.
Oh yes! And they never get cold.